Locate the LAN Console Port on your system. For our Modell 520 it is the T5 port. If you are unsure check the Power Systems info center for informations how to locate the Lan Console port. Check with wrkhdwrsc *cmn and wrkcfgsts *lin that there is no active line description configured for this ethernet port. The Lan Console port cannot be shared with other Ethernet lines on your system.
Then sign in to the System Service Tools with strsst
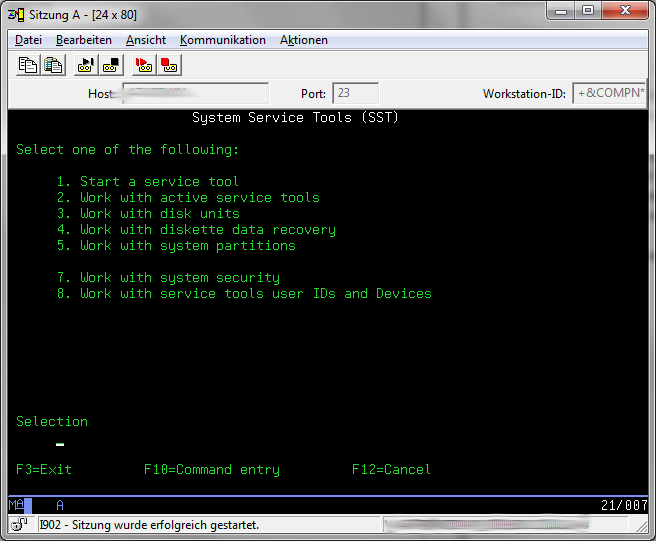
Choose Option 8 "work with service tools user IDs and Devices"
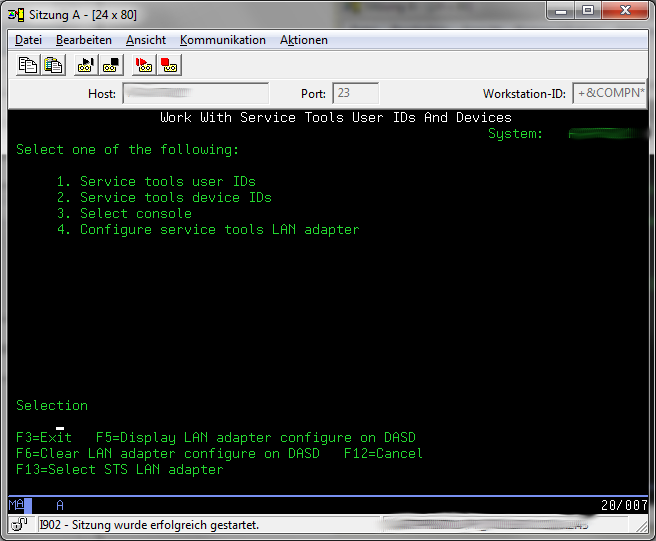
Choose option 4 "Configure service tools LAN adapter"
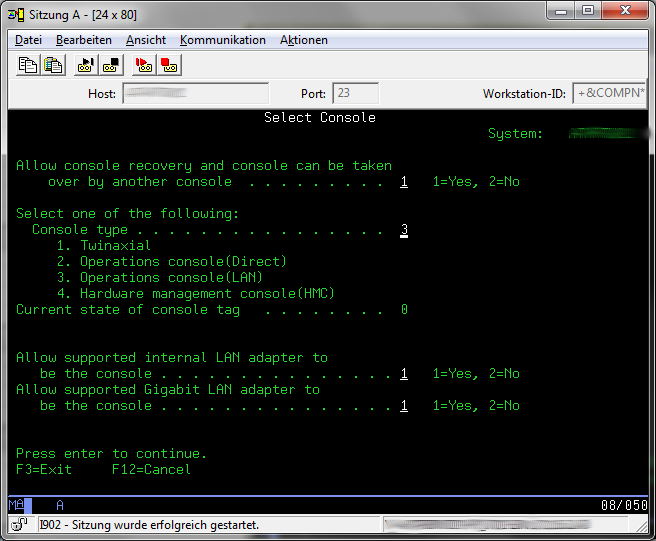
Change all values on the "select console" so that the match the screenshot and the press "Enter" to continue.
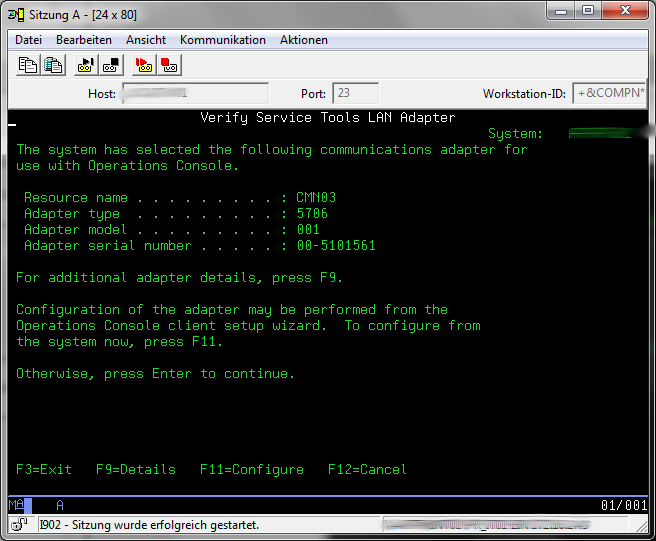
Press F11 to go to configure your new service LAN Adapter.
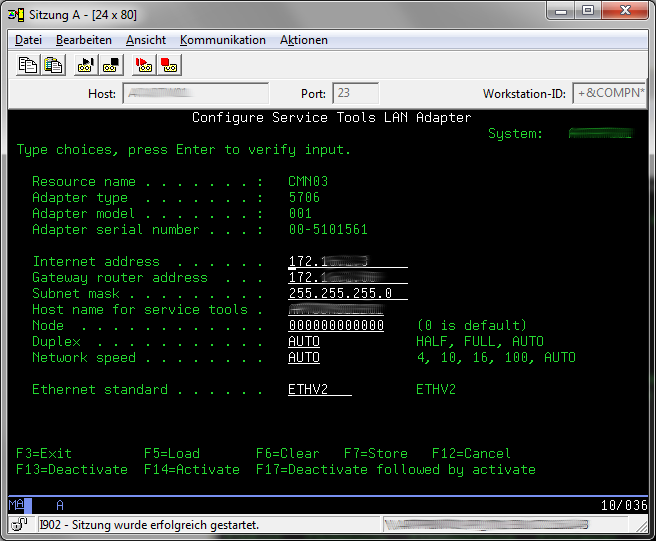
Fill in a static IP Address for the LAN Adapter and the default gateway and subnet mask matching your LAN configuration. As an Hostname for service tools you can use every symbolic name you want for example "SYSCONSOLE1". This IP address habe to be unused and must not match any IP Address of other servers in your network. Then press "F7" to store your configuration and go back with multiple "F3 presses to the start screen of the SST.
Normally you have to make an IPL to activate your new console configuration. But if you are not able to IPL your machine you can try the following steps to activate the LAN Console without an IPL.
Start SST with STRSST if you are not already in the SST Screen.
Select Option 1 "Start a service tool"
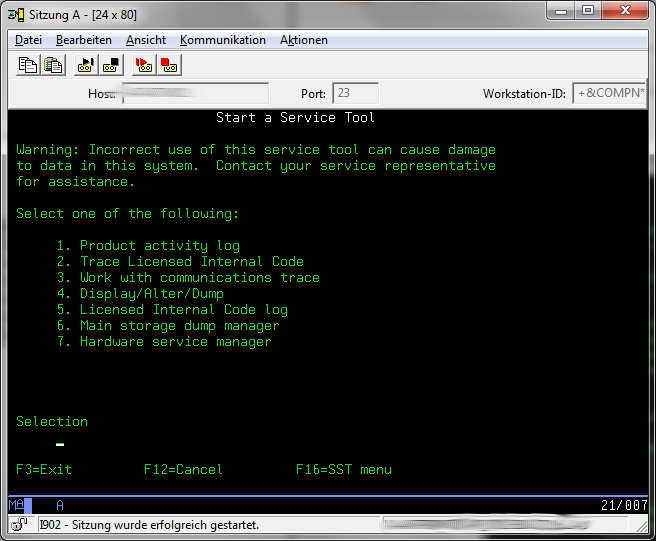
Select Option 4 "Display/Alter/Dump"
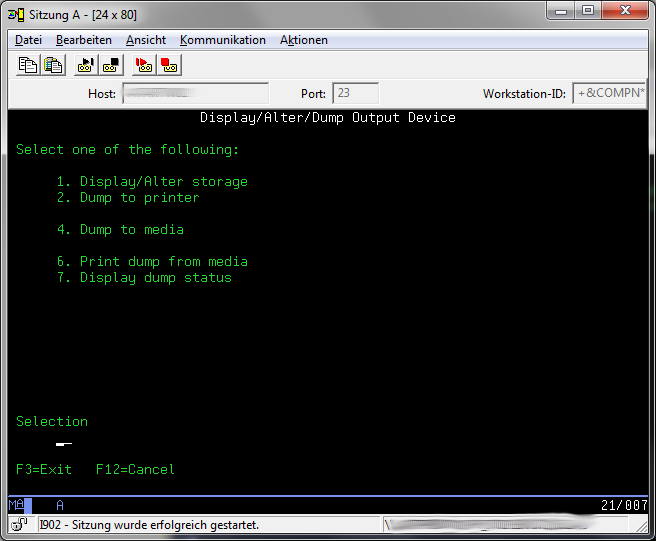
Select Option 1 "Display/Alter storage"
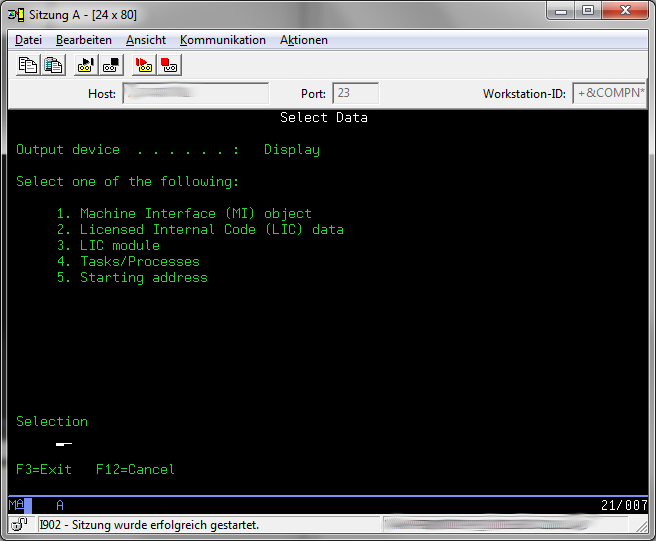
Select Option 2 "Licensed Internal Code (LIC) data"
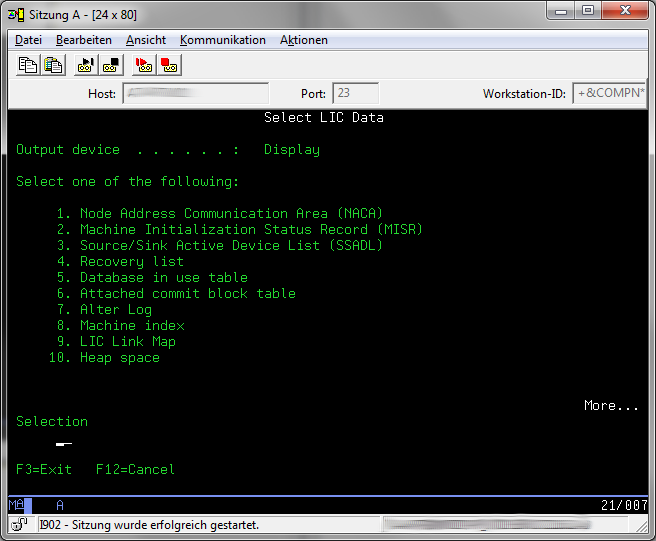
Press Page Down to go to the second menu of "Select Lic Data".
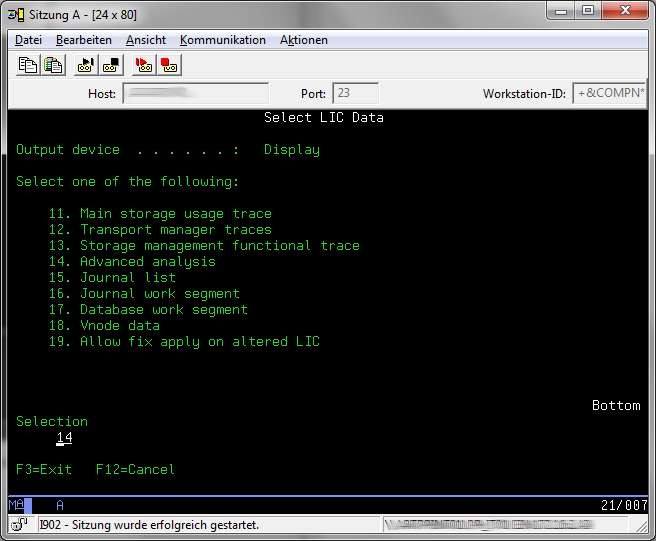
Select Otion 14 "Advanced Analysis" and page down in the List of the Macros till you see the "OPCONSOLE" macro.
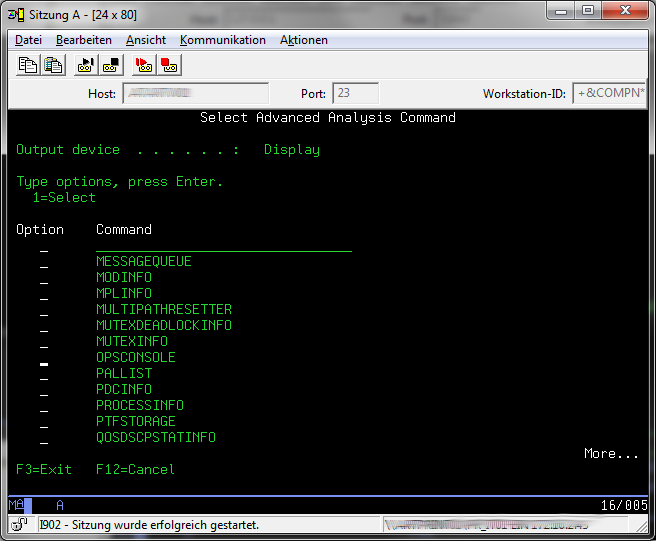
Select the "OPCONSOLE" macro with "1"
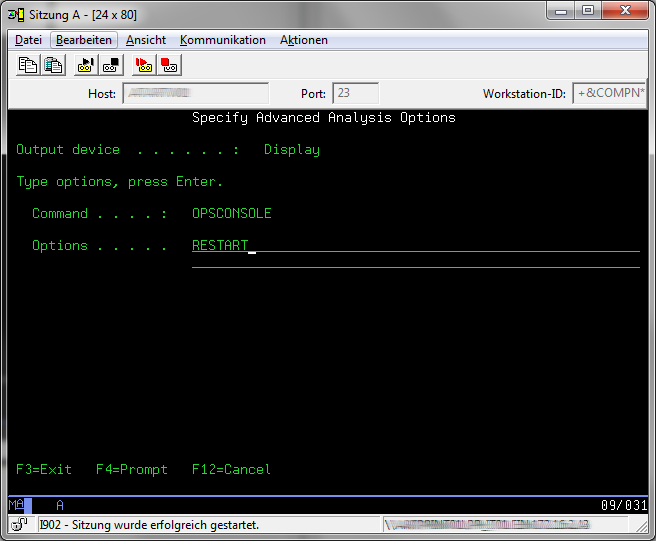
Fill in "RESTART" as the option and press enter to run the macro. After that you can leave the SST.
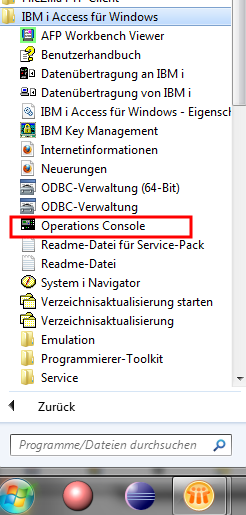
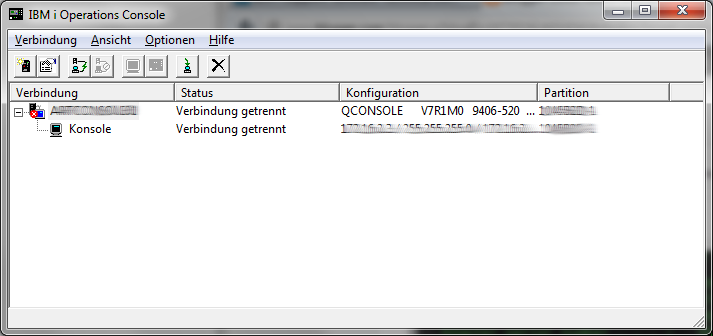
Now you can try your new LAN console on your local workstation. Start the "Operations Console" from the i Access start menu.
No comments:
Post a Comment